LDAP Contact Resolution
Overview
Resolve caller identity directly from your existing Active Directory or LDAP server. When a call arrives, Call Telemetry queries your directory to look up the caller's name, department, and other attributes -- displaying the information on Cisco IP phones in real-time.
This eliminates the need to maintain a separate contact database. Your directory is already the authoritative source for employee and contact information -- Call Telemetry reads it directly during each call.
Requirements
- Call Telemetry Appliance 0.8.6 or later
- Call Telemetry Premium License
- Cisco CallManager with CURRI API Integration
- Configured External Call Control Profile Inspection - A route pattern, translation pattern, or phone extension must be enabled for Call Telemetry policy inspection
- LDAP or Active Directory server accessible from the Call Telemetry appliance
- A service account with read access to the directory (bind DN and password)
Configuration
LDAP contact resolution is configured as a policy app, the same way as PostgreSQL and webhook integrations.
Step 1: Create the LDAP Contact Resolution App
- Navigate to Realtime Policies → Apps
- Click Add → Select LDAP Contact Resolution under the Realtime tab
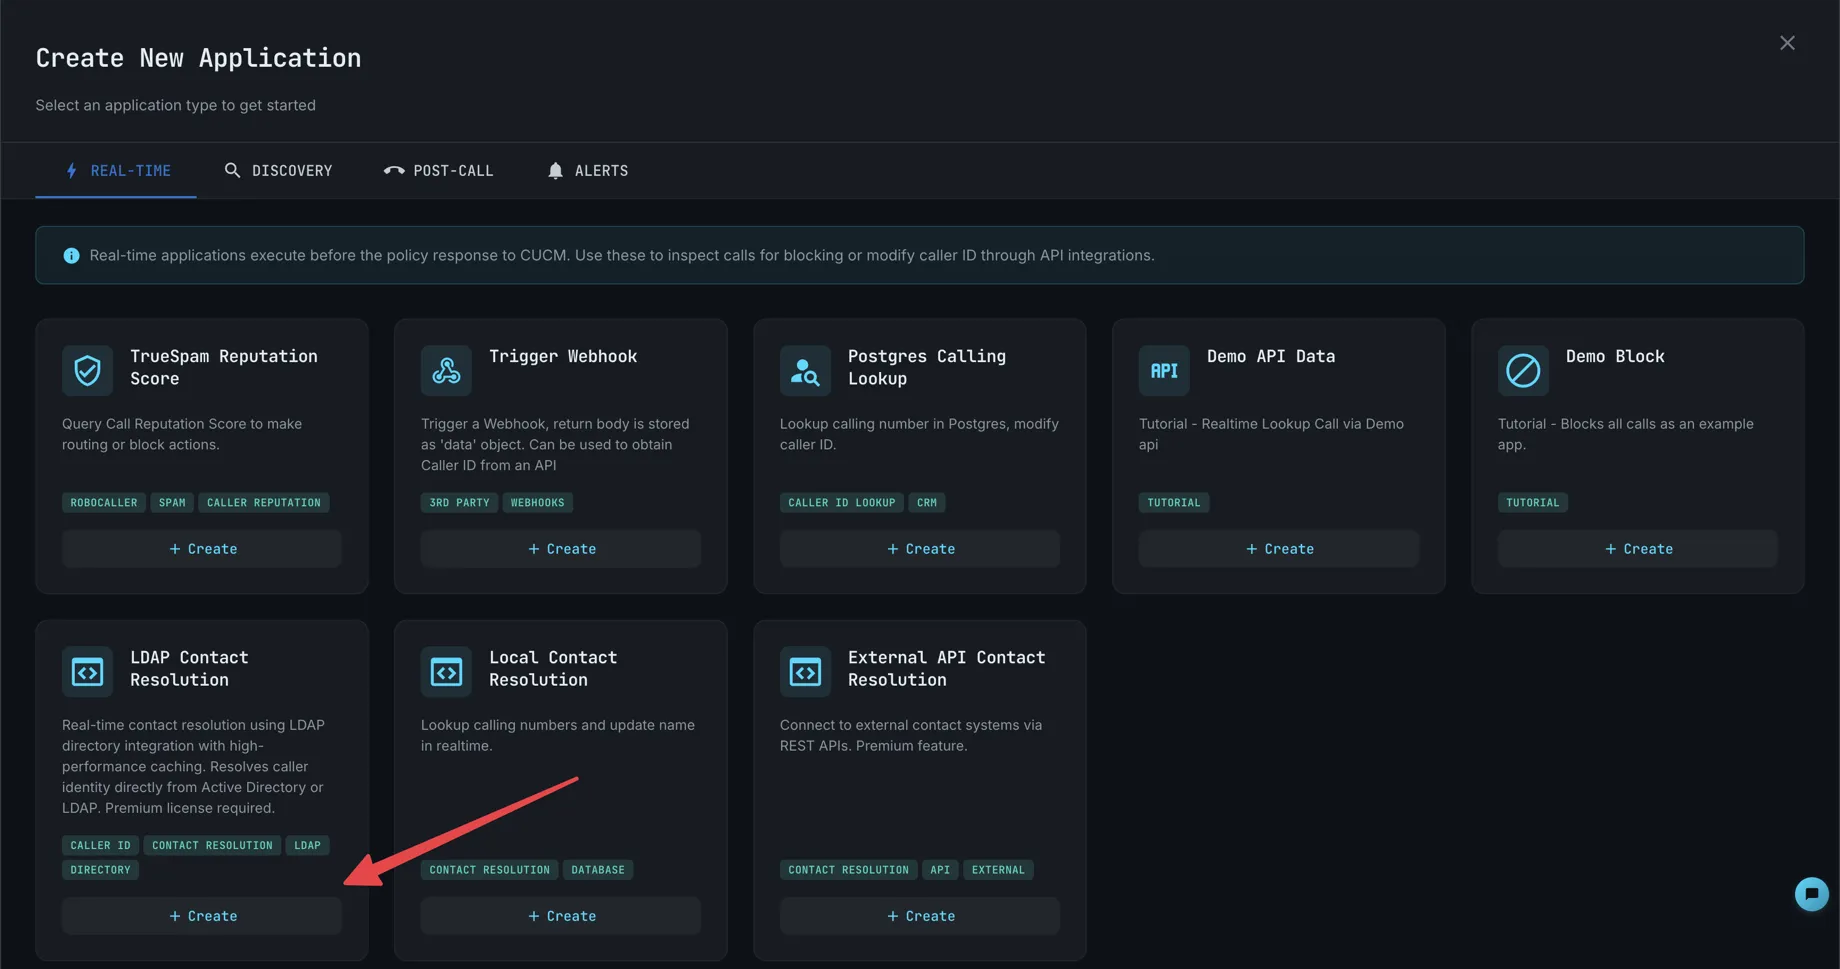
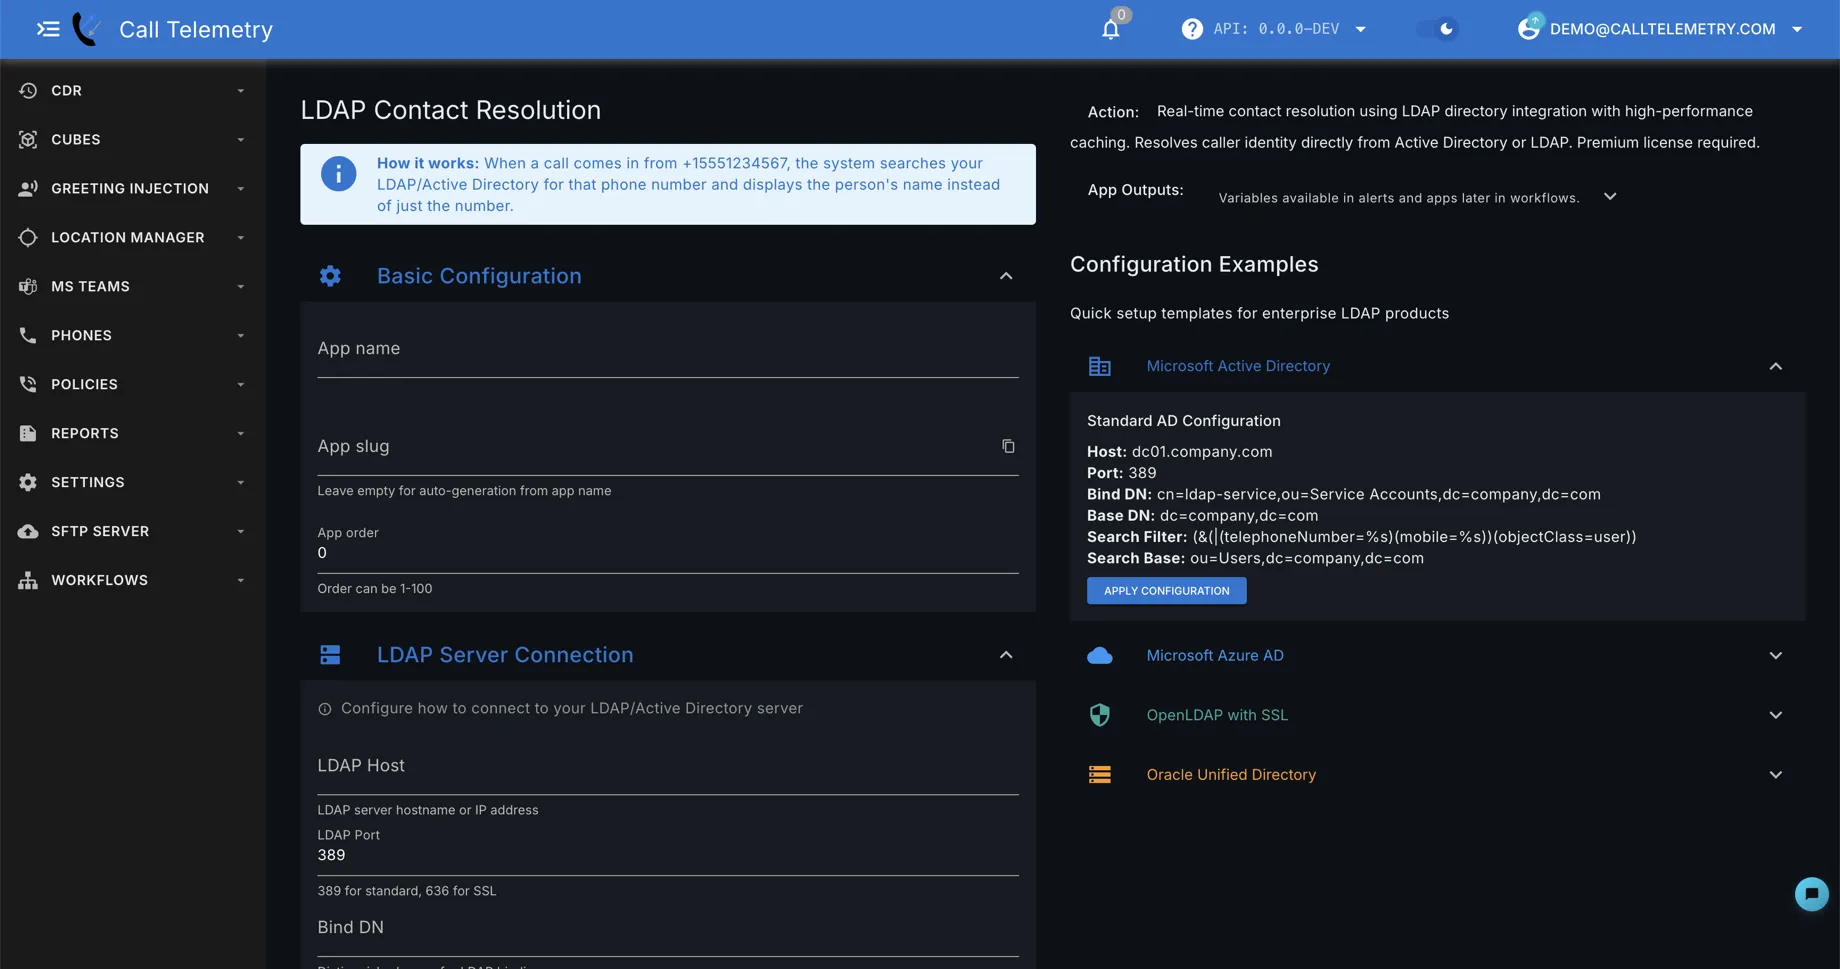
- Configure your LDAP connection:
- Host -- LDAP server hostname or IP address
- Port -- Default
389(LDAP) or636(LDAPS) - Enable SSL/TLS -- Check this for secure connections (port 636)
- Base DN -- The search base for lookups (e.g.,
DC=company,DC=com) - Bind DN -- Service account DN (e.g.,
CN=svc-calltelemetry,OU=Service Accounts,DC=company,DC=com) - Bind Password -- Service account password
- Configure the search filter and attribute mapping (see below)
- Click Save
Step 2: Associate with a Policy Rule
- Navigate to Policies and open your call policy
- Select the rule that handles incoming calls
- Click Associate App and select your LDAP Contact Resolution app
- Save the rule
The LDAP lookup now executes for every call that matches the rule's trigger pattern.
Active Directory Example
Host: ad.company.com
Port: 636
SSL: Enabled
Base DN: DC=company,DC=com
Bind DN: CN=svc-calltelemetry,OU=Service Accounts,DC=company,DC=com
The service account needs only read permissions -- no write access is required. Set the Base DN to your domain root or a specific organizational unit to narrow the search scope.
OpenLDAP Example
Host: ldap.company.com
Port: 389
SSL: Disabled
Base DN: dc=company,dc=com
Bind DN: cn=readonly,dc=company,dc=com
For OpenLDAP servers without TLS, use port 389. If your environment requires encrypted connections, configure your OpenLDAP server with StartTLS or LDAPS on port 636 and enable the SSL/TLS option.
Search Filter and Attribute Mapping
Search Filter
The search filter determines how Call Telemetry finds the caller in your directory. The default filter searches the telephoneNumber attribute:
(telephoneNumber=%s)
Where %s is replaced with the caller's phone number at runtime. To search across multiple phone attributes (office, mobile, IP phone), use an OR filter:
(|(telephoneNumber=%s)(mobile=%s)(ipPhone=%s))
Phone Search Patterns
The system automatically tries multiple phone number variations to maximize match rates. By default, it searches with these patterns for each call:
%s-- the number as-is+%s-- with a leading+1%s-- with a leading1(North American country code)
This means if a caller dials from 4085551234, Call Telemetry also checks for +4085551234 and 14085551234 in your directory, improving match rates when phone number formats vary between CUCM and your directory.
Attribute Mapping
The LDAP app maps directory attributes to contact fields. These are the defaults, which you can customize to match your directory schema:
| Contact Field | Default LDAP Attribute | Description |
|---|---|---|
| Name | displayName | Displayed as the caller name on Cisco IP phones |
| Company | company | Available in policy rules and call history |
| Department | department | Available in policy rules and call history |
mail | Available in policy rules and call history |
The resolved name replaces the raw phone number on the destination phone's display. Additional fields are available for use in policy rules, alerting, and reporting.
Testing Your Configuration
Call Test Verification
- Navigate to Policies → Call Test
- Enter a calling number that matches a directory entry
- Run the test
- Verify the resolved name appears in the call test results
- Check the CURRI response panel to confirm the Calling Party Name shows the directory name
The LDAP Contact Resolution app automatically sets the calling party name when a match is found — you do not need to manually configure a modifier in your rule.
Troubleshooting
Connection refused?
Verify the LDAP server is reachable from the Call Telemetry appliance. Check firewall rules for ports 389 (LDAP) or 636 (LDAPS).
Bind failed?
Verify the bind DN and password are correct. For Active Directory, use the full distinguished name format (CN=user,OU=...,DC=...), not the user@domain.com UPN format.
TLS/SSL errors? If using self-signed certificates, verify that the Call Telemetry appliance trusts the certificate authority. Try disabling SSL temporarily to isolate whether the issue is TLS-related or a connectivity problem.
No results returned? Verify the base DN includes the OU where your contacts are stored. Confirm the service account has read permissions. Check that the phone number format in your directory matches what CUCM sends -- the phone search patterns help with common variations, but unusual formats may need a custom search filter.
Slow lookups?
Ensure the base DN is scoped as narrowly as possible. Searching from the domain root traverses the entire directory tree. Narrowing to a specific OU (e.g., OU=Employees,DC=company,DC=com) reduces search time significantly.
Related Topics
- LDAP Authentication -- Configure LDAP for administrator login and role mapping
- REST API Contact Resolution -- Connect external CRM systems for caller ID
- CRM & Contact Resolution Overview -- Data source comparison