CSV Contact Import
Overview
Import your existing contact databases into Call Telemetry using CSV files. The import system automatically detects column headers and maps them to contact fields, so you spend less time reformatting spreadsheets and more time using your data.
Whether you are migrating from another platform, syncing an internal directory, or loading a purchased contact list, the CSV importer handles thousands of contacts in a single operation with detailed error reporting.
Requirements
- Call Telemetry Appliance 0.8.6 or later
- Call Telemetry Premium License
- Cisco CallManager with CURRI API Integration
- Configured External Call Control Profile Inspection - A route pattern, translation pattern, or phone extension must be enabled for Call Telemetry policy inspection
CSV Format
Prepare your CSV file with a header row and one contact per line. At minimum, each row needs a phone number and a name.
phone_number,name,company,department,email,title
+14085551234,Jane Smith,ACME Corp,Sales,jane@acme.com,Account Manager
+14085555678,John Doe,Widgets Inc,Engineering,john@widgets.com,Lead Engineer
2125559000,Sarah Connor,Cyberdyne Systems,Research,sarah@cyberdyne.com,Director
Phone numbers accept any common format. The system normalizes them automatically during import — see Phone Number Normalization for details on how formatting and country codes are handled.
Supported Column Headers
The system recognizes these column names (case-insensitive). You do not need to rename your columns if they already use common naming conventions.
| Contact Field | Recognized Headers |
|---|---|
| Phone Number | phone_number, phone, number, phone number |
| Name | name, full_name, fullname, contact_name, display_name |
| Company | company, organization, org, business |
| Department | department, dept, division, team |
email, email_address, e-mail, emailaddress | |
| Title | title, job_title, position, role |
If a column header does not match any recognized name, the system skips that column and reports it in the import results.
Import Steps
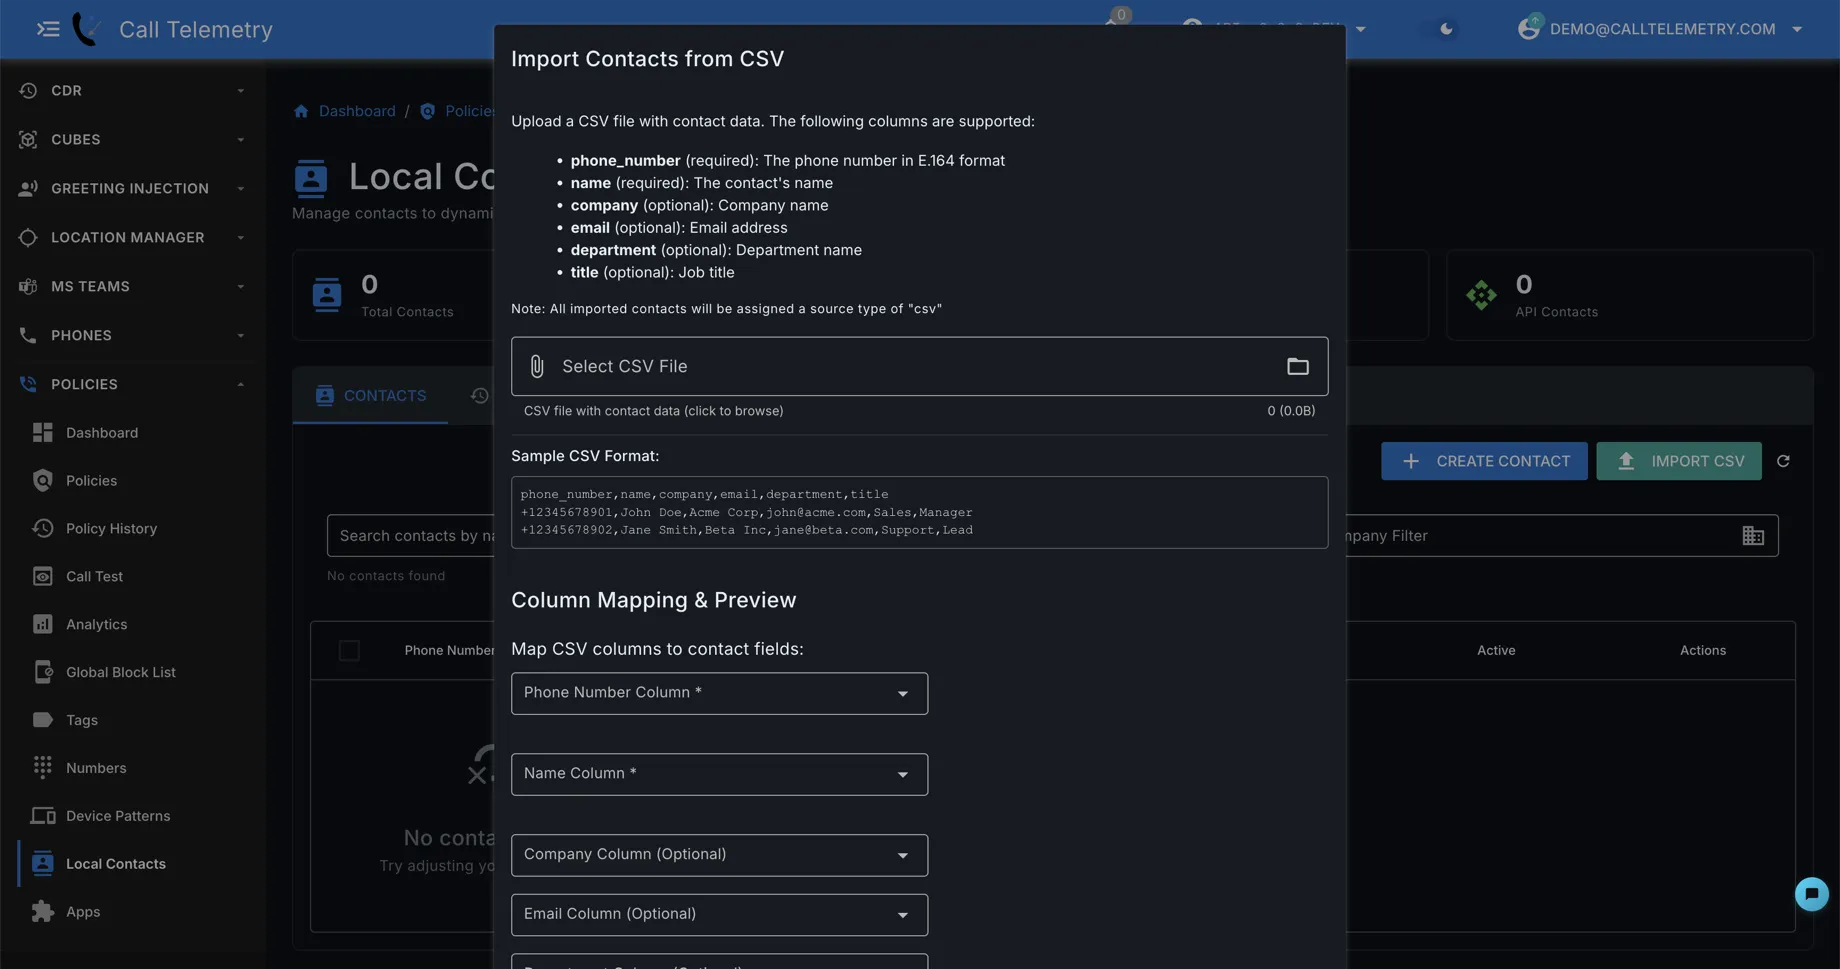
- Navigate to Policies → Local Contacts
- Click Import CSV
- Select your CSV file from your local machine
- Review the column mapping — the system auto-detects headers and shows you which CSV columns map to which contact fields
- Click Import
- Review the import results summary showing how many contacts were imported, skipped, or had errors
Validation
The system validates each row during import:
- Phone Number and Name are required fields. Rows missing either value are skipped.
- Phone numbers are normalized automatically. Formatting differences do not cause duplicates.
- Email addresses are validated for proper format when provided.
- Rows that fail validation are skipped and reported in the error details.
The import results provide a clear breakdown of imported, skipped, and errored rows so you know exactly what happened.
Troubleshooting
Import shows many skipped rows? Check that your CSV includes both a phone number and name column. Rows missing either required field are skipped. Open the CSV in a text editor to verify the delimiter is a comma and not a semicolon or tab.
Wrong column mapping?
Rename your CSV headers to match one of the recognized names listed in the table above. The mapping is case-insensitive, so Phone Number and phone_number both work.
Character encoding issues? Save your CSV as UTF-8 encoding. Most spreadsheet applications default to UTF-8, but older exports from legacy systems sometimes use Windows-1252 or ISO-8859-1 encoding. Re-save the file as UTF-8 in your text editor or spreadsheet application before importing.
Duplicate phone numbers? If you import a CSV containing a phone number that already exists, the existing record is preserved and the duplicate row is skipped. To update existing contacts, edit them individually through the UI or re-import after deleting the old records.