Webhook CRM Integration
Overview
Connect any REST API to Cisco CallManager using Call Telemetry's policy engine. When a call arrives, Call Telemetry sends a webhook to your API endpoint — you can use the response to display the caller's name on Cisco IP Phones, or simply publish call data to external systems for logging, ticketing, or analytics.
Common use cases:
- Caller ID resolution — Look up a name from your CRM and display it on the phone
- Call logging — POST call data to Salesforce, ServiceNow, or a ticketing system
- Screen pops — Trigger a browser popup or desktop notification on incoming calls
- Custom workflows — Route calls or trigger automations based on API response data
This guide uses the Star Wars API as a demonstration endpoint. The same steps apply to any REST/JSON API — Salesforce, ServiceNow, HubSpot, or your own internal systems.
Requirements
- Call Telemetry Appliance 0.8.6 or later
- Call Telemetry Premium License
- Cisco CallManager 8.5+ with CURRI API integration configured
Step 1: Create a Call Policy
- Navigate to Policies
- Click Add Policy
- Name it (e.g., "CRM Policy")
Step 2: Create a Policy Rule
- Select your new policy
- Click Add Rule
- Define a trigger pattern using Regular Expressions (e.g.,
.*to match all calls)

tip
You can apply the policy to a translation pattern, route pattern, or phone extension. The policy triggers on all calls that match the rule pattern.
See the Call Policy Design Guide for architecture details.
Step 3: Create a Webhook App
- Navigate to Realtime Policies → Apps
- Click Add → Select Webhook under the Realtime tab
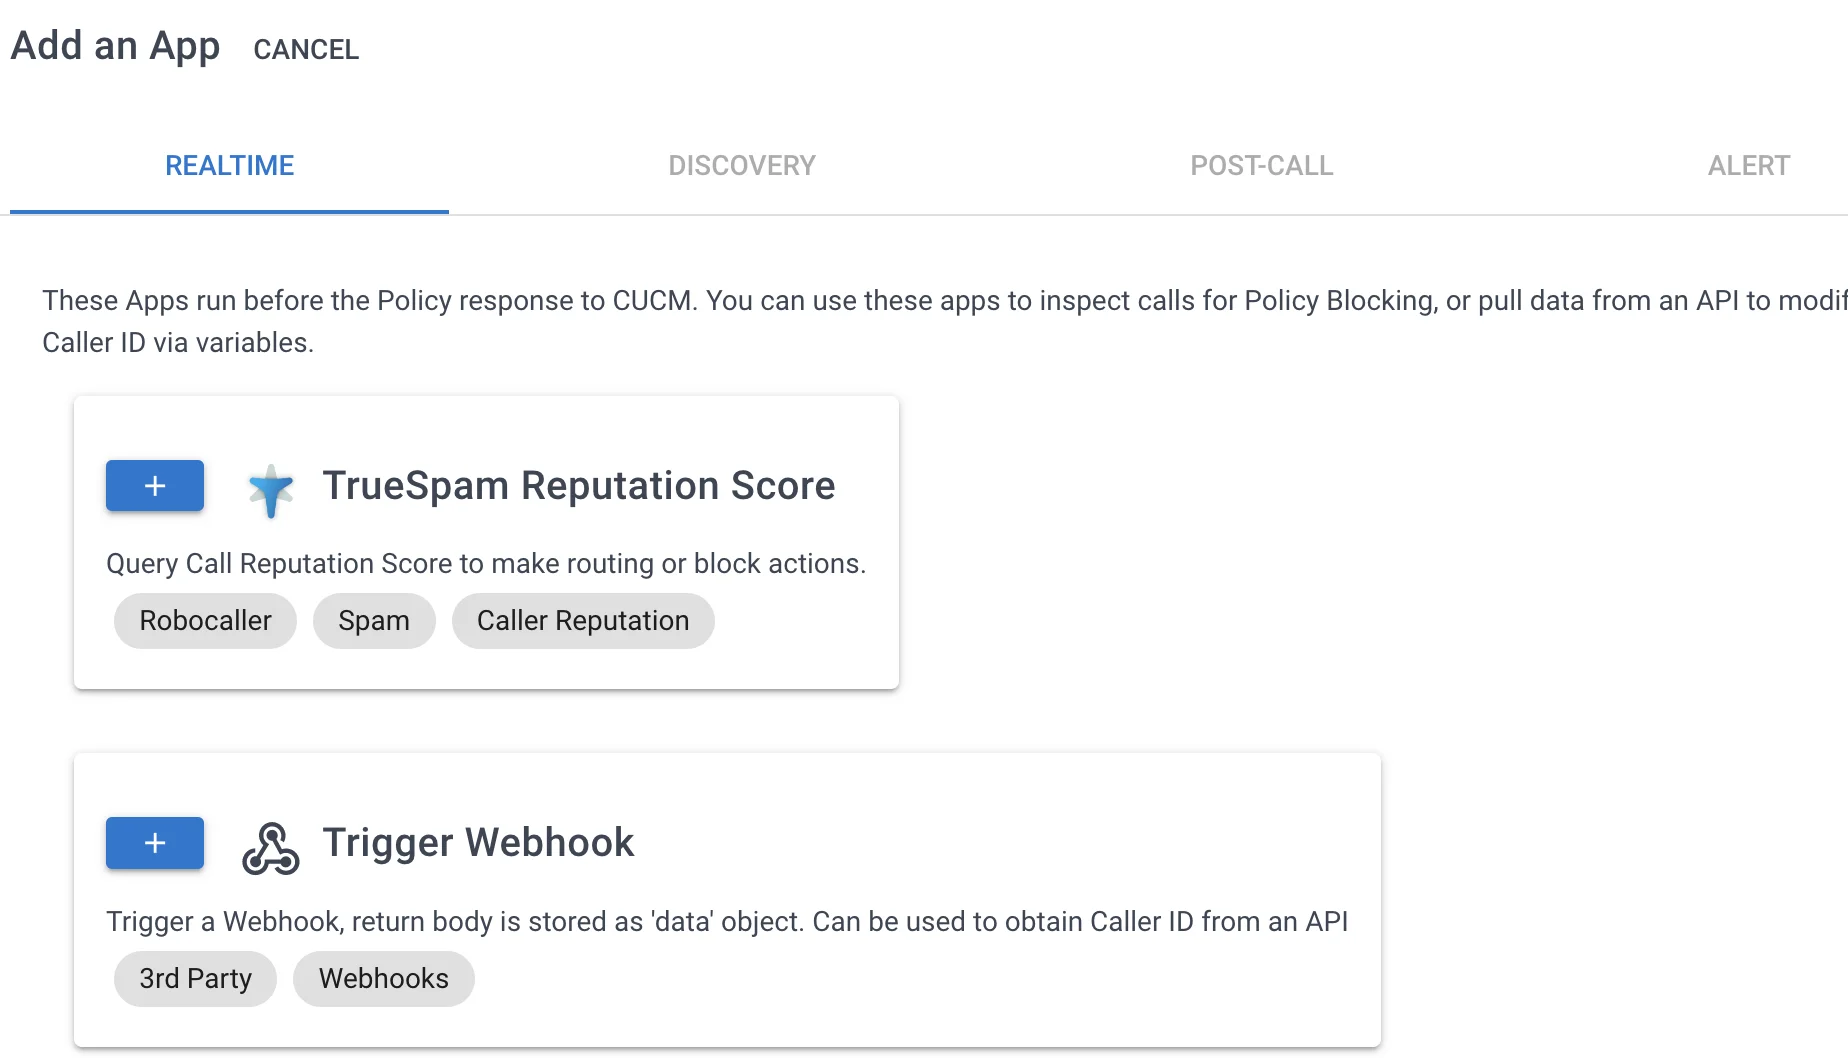
- Configure the webhook:
- Name: Descriptive name (e.g., "CRM Caller ID Lookup")
- Description: Brief description of the integration
- URL: Your API endpoint URL. Use
{event.calling_number}as a template variable. For this demo:https://swapi.dev/api/people/{event.calling_number}/ - HTTP Method: Select
GET
Step 4: Associate the Webhook with Your Rule
- Navigate to Policies and select your CRM rule
- Open the rule and click Associate App
- Select your Webhook App
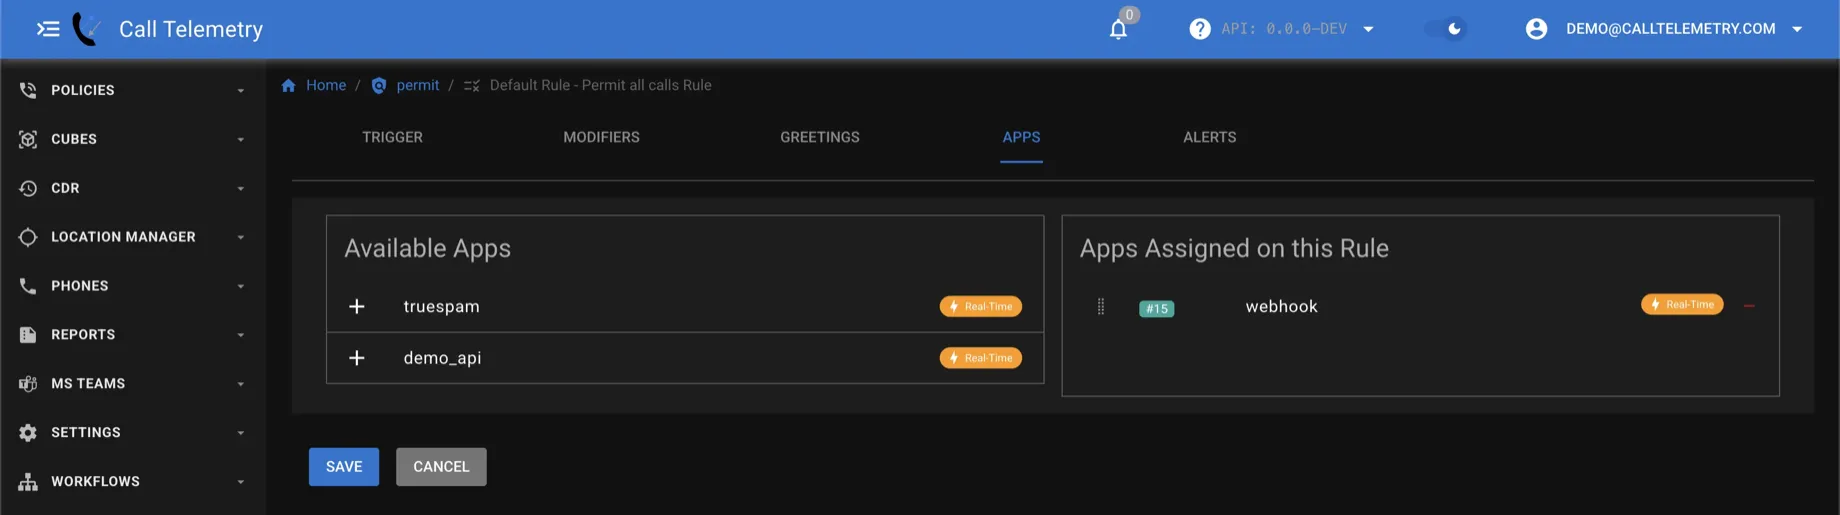
Step 5: Test the Integration
- Navigate to Policies → Call Test
- Enter a test calling number that maps to your CRM data (e.g.,
1for the demo API) - Run the test
- Check
app_data.webhooks.datain the results for your API response
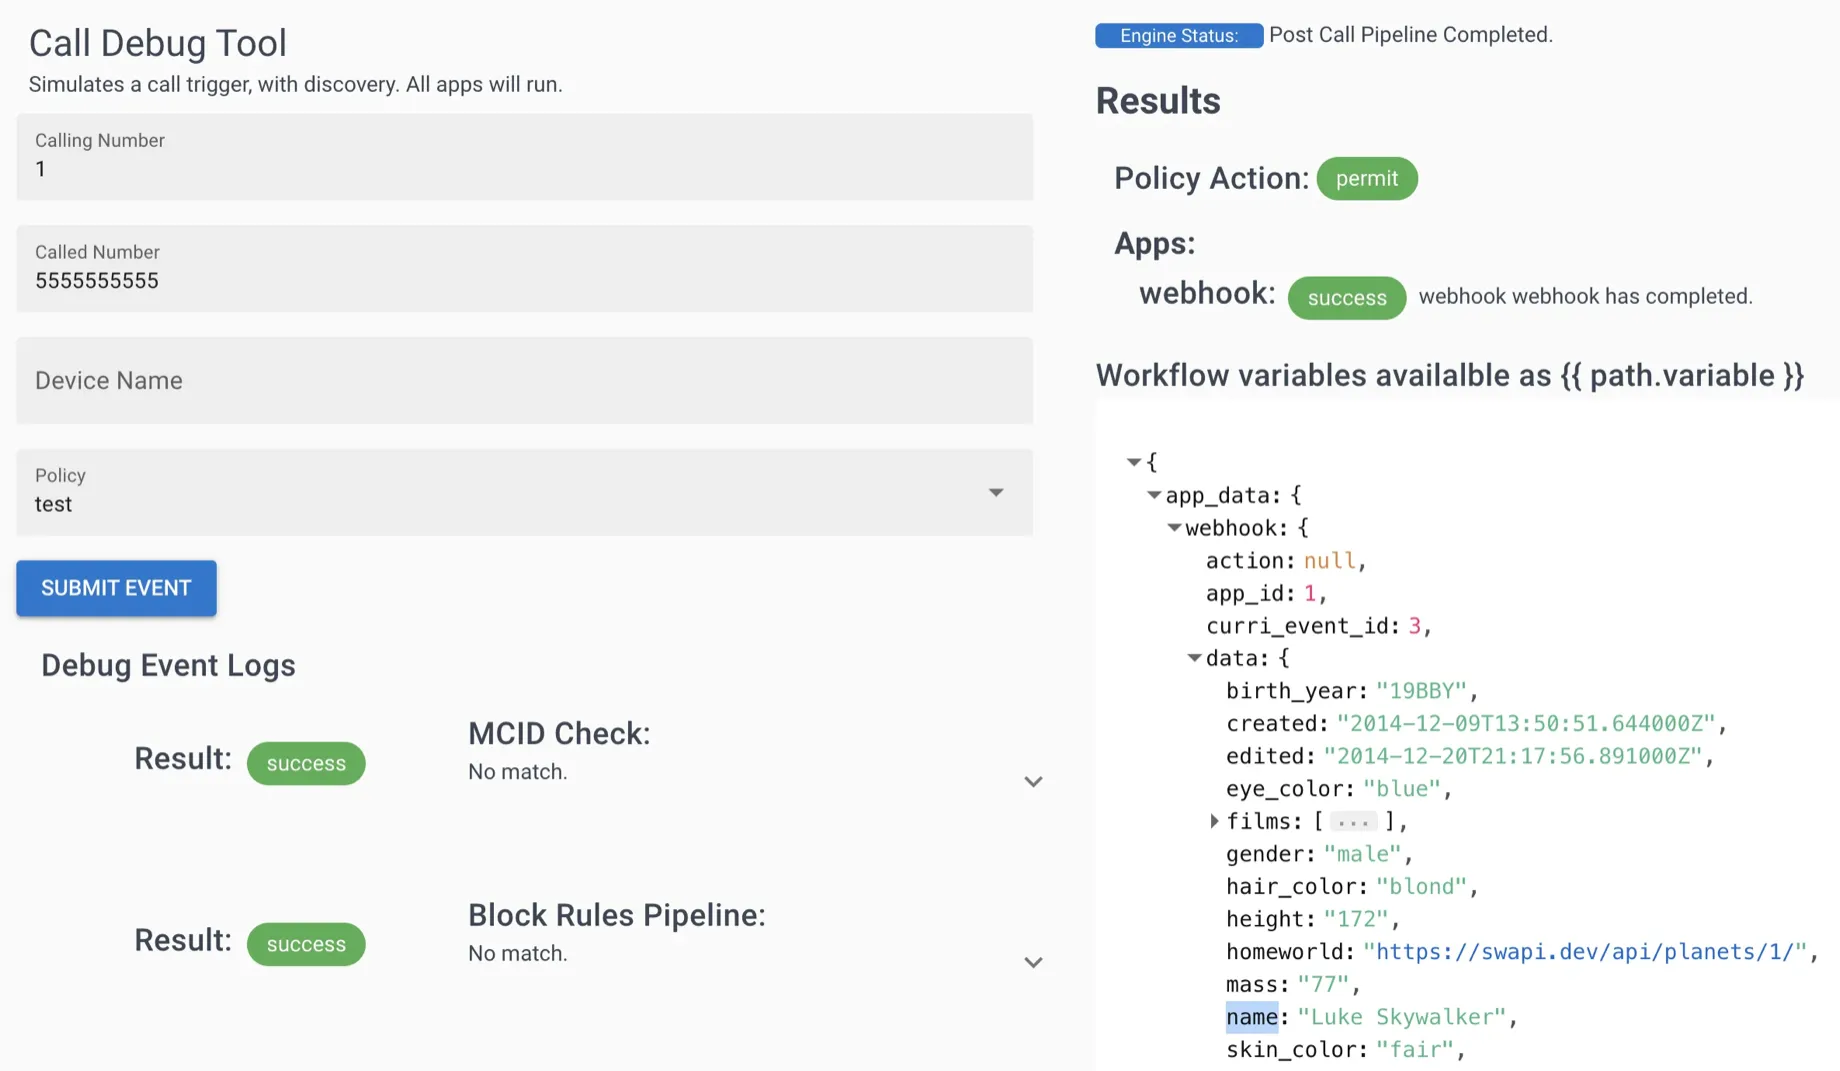
Step 6: Map the Caller Name
- Open your rule configuration
- Use
{app_data.webhook.data.name}in the Calling Party Name modifier to display the resolved name
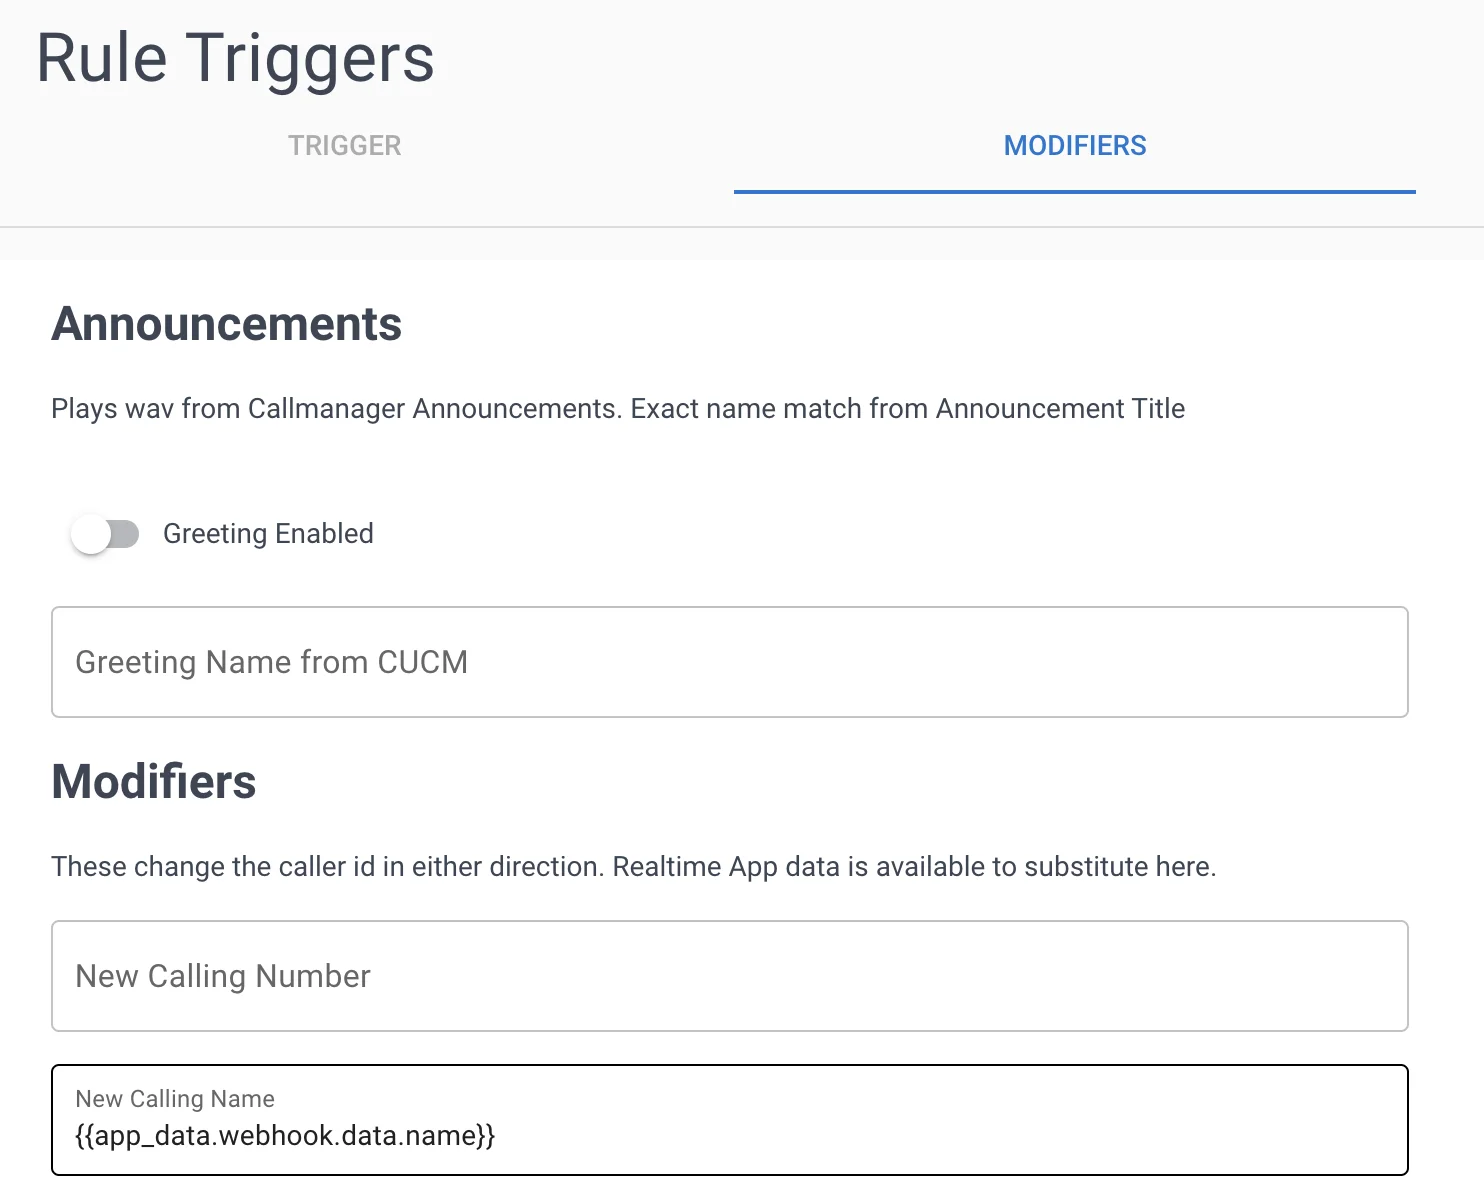
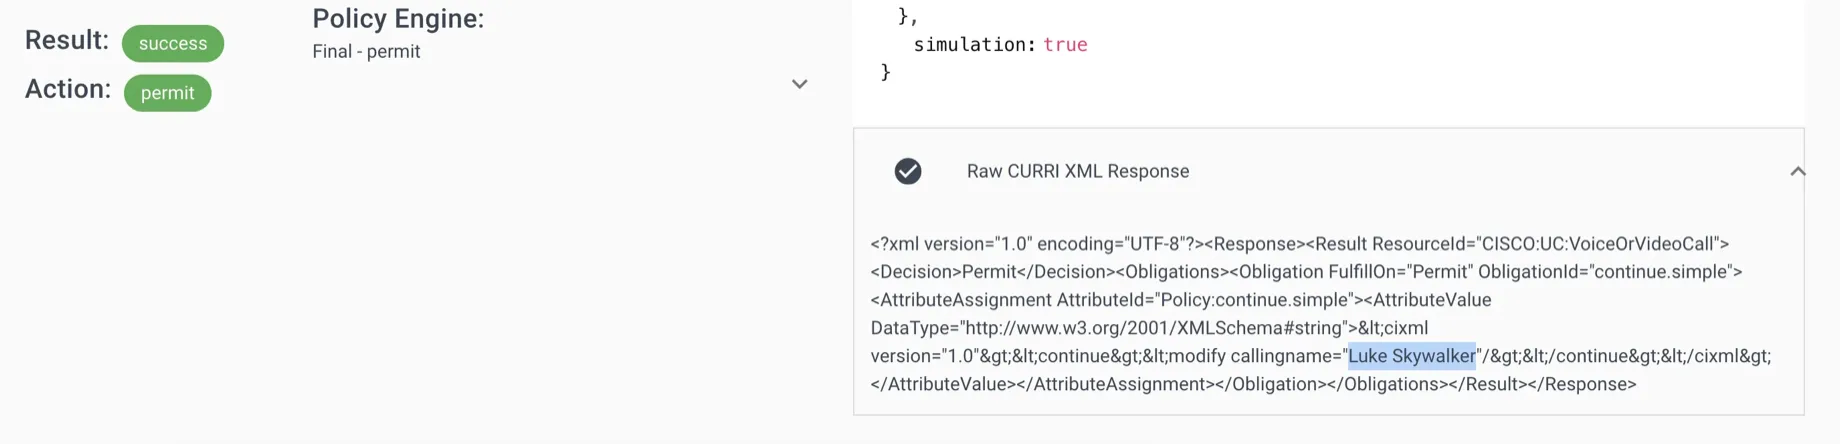
Step 7: Verify End-to-End
- Run another call test
- Check the raw CURRI API response — the
calling_namefield should contain the resolved name - This is the payload Cisco CallManager uses to display the name on Cisco IP Phones
Related Topics
- REST API Contact Resolution — API configuration reference and template variables
- PostgreSQL CRM Integration — Direct SQL database lookups
- CRM & Contact Resolution Overview — All data source options
- Webhooks & Exports — CUBE webhooks and CDR webhooks for outbound call data streaming