Air-Gapped Appliance Upgrade
EssentialsOverview
This guide is for appliances that cannot reach the internet. Use Call Telemetry Appliance Manager on an internet-connected workstation to build an offline upgrade bundle, transfer it to your appliance, then apply it with the on-appliance CLI.
If your appliance has internet access, use the one-command online upgrade instead.
Workflow Summary
- Download and install Appliance Manager (macOS or Windows)
- Build a Full Release or Patch Bundle in the UI (or via
ct offline download) - Transfer the bundle to the appliance or stage it on an internal SFTP/FTP server
- On the appliance: apply with
sudo ct offline apply(from remote SFTP/FTP, mounted ISO, or local folder) - Verify the upgrade
Step 1 — Download Appliance Manager
Download Call Telemetry Appliance Manager for macOS or Windows:
| Platform | Download |
|---|---|
| macOS (Apple Silicon) | Call-Telemetry-Appliance-Manager_macos_aarch64.dmg |
| macOS (Intel) | Call-Telemetry-Appliance-Manager_macos_x64.dmg |
Windows (.msi) | Call-Telemetry-Appliance-Manager_windows_x64.msi |
Windows (.exe installer) | Call-Telemetry-Appliance-Manager_windows_x64-setup.exe |
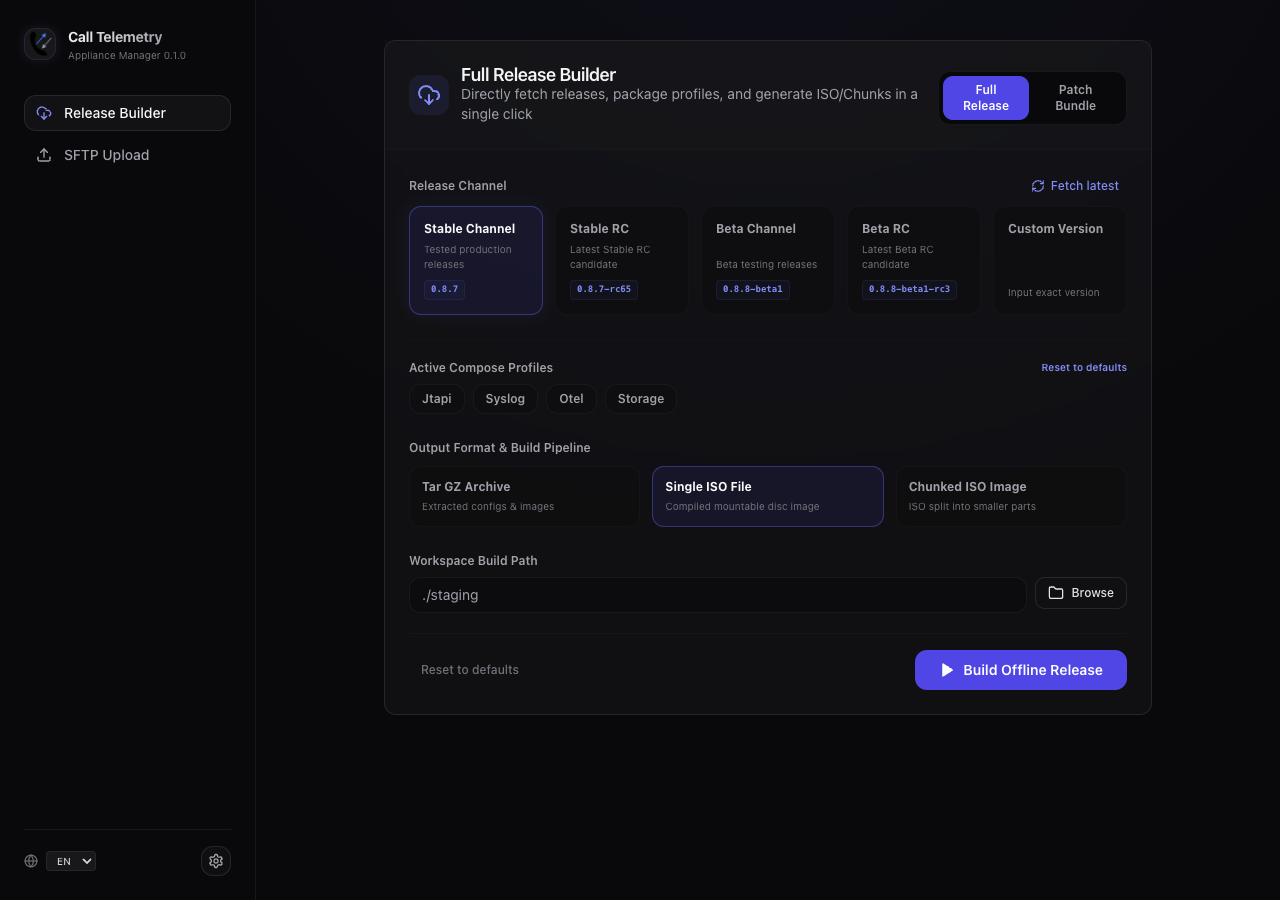
Open the app after installation. Release Builder is the main workspace; SFTP Upload transfers a finished bundle to an appliance.
Step 2 — Build a Bundle
On Release Builder, choose Full Release or Patch Bundle based on the appliances you need to update.
| Bundle | Best for | How size is optimized |
|---|---|---|
| Patch Bundle | One or more appliances on the same, known source version | Compares the source and target image manifests and includes only new or changed container images. Unchanged images must already exist on the appliance. |
| Full Release | Unknown or mixed source versions, recovery media, or a reusable bundle for multiple appliance baselines | Includes the complete target configuration and every image required by the selected compose profiles. Clear optional profiles you do not use to reduce the bundle. |
A patch is usually the smallest transfer, but its size depends on how many images changed between the two releases. If most images changed, the patch can approach the size of a full bundle. Tar GZ, Single ISO, and Chunked ISO package the same payload differently; chunking limits each file's size but does not reduce the total transfer.
Full Release
- Select Full Release.
- Choose a channel: Stable Channel, Stable RC, Beta Channel, Beta RC, or Custom Version (or use Fetch latest).
- Optionally narrow compose profiles for a smaller bundle.
- Choose output format: Tar GZ archive (folder layout), Single ISO, or Chunked ISO.
- Confirm the output path, then start the build.
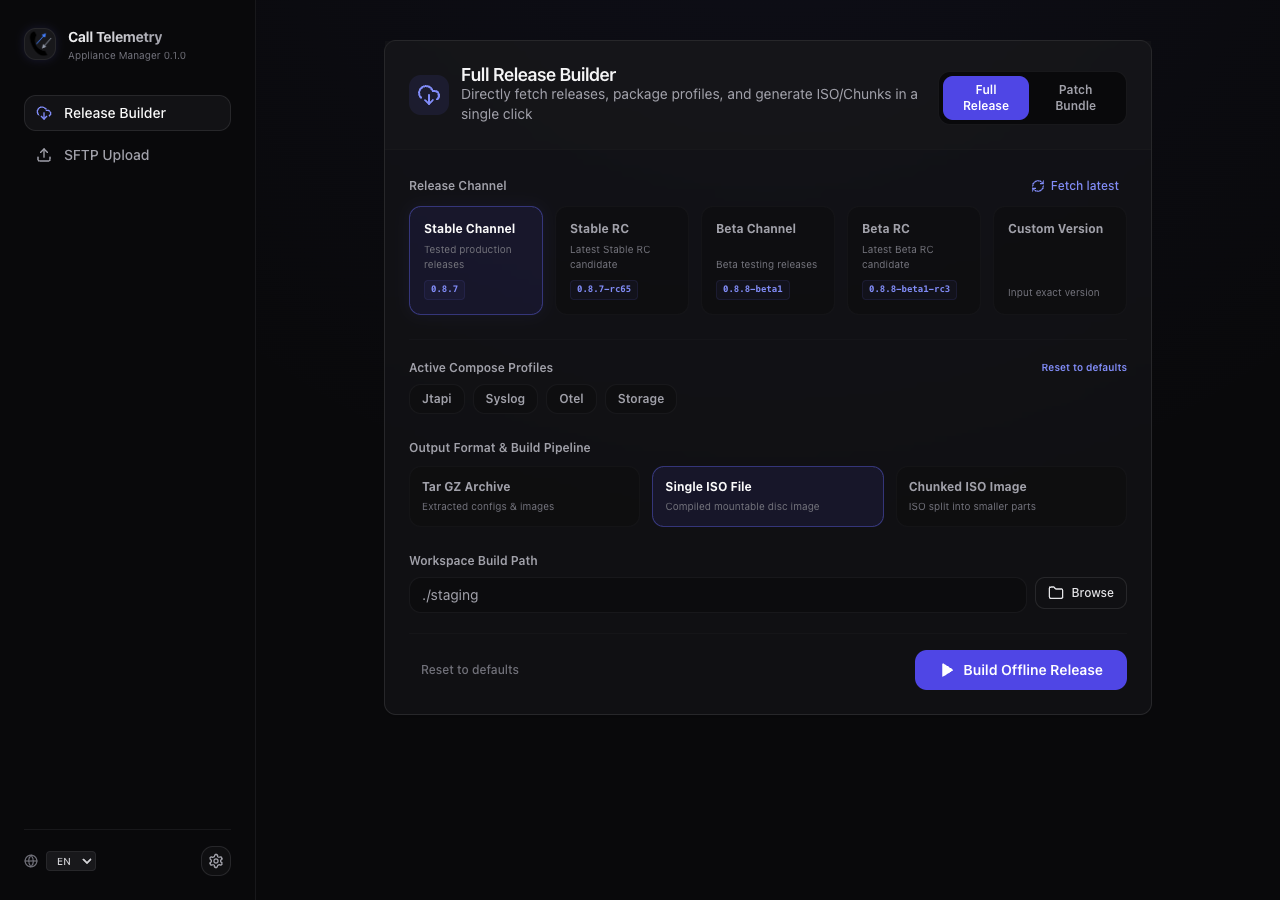
The app downloads release configuration and container images over the workstation network.
Preferences
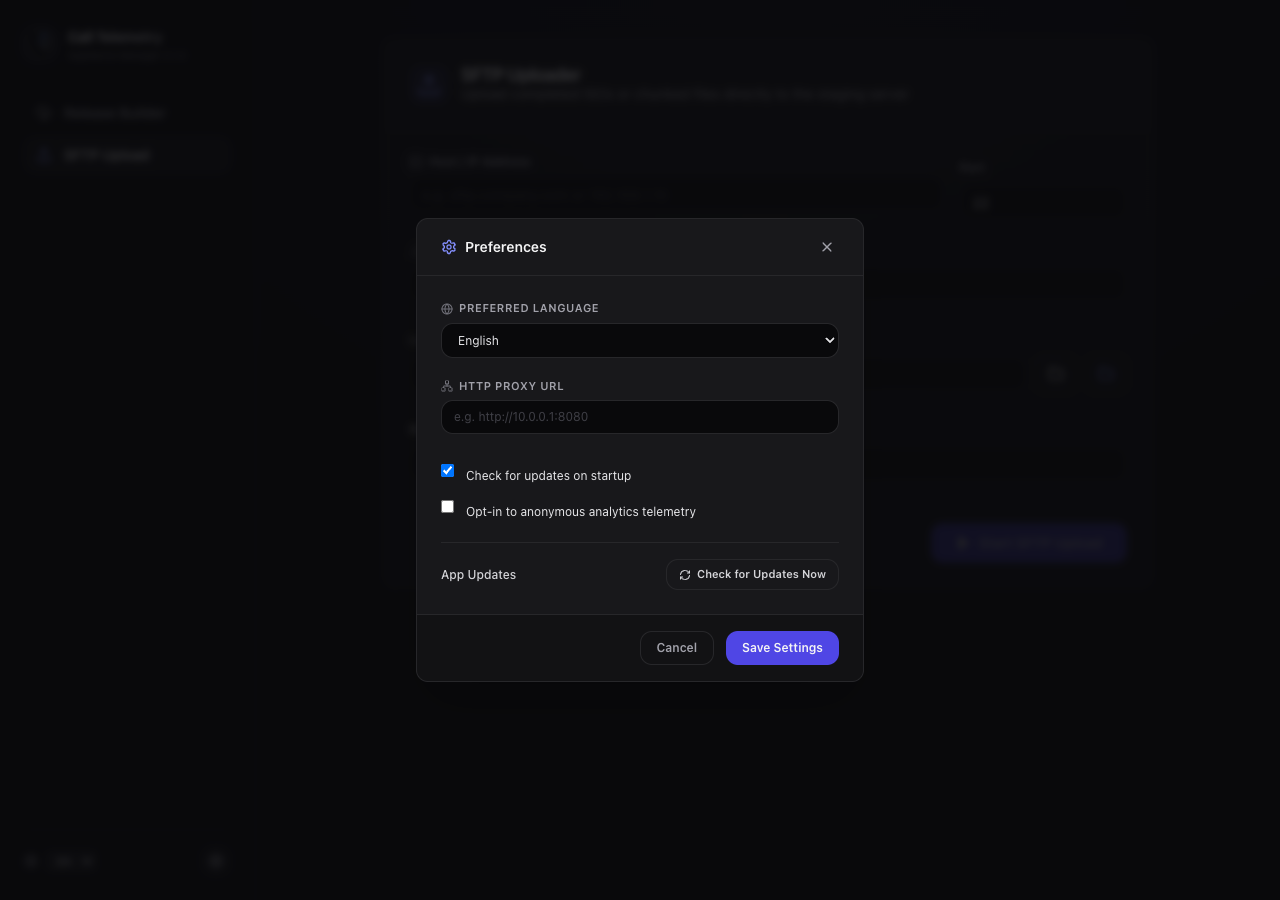
Open the gear at the bottom of the sidebar to configure the workstation app:
| Preference | Purpose |
|---|---|
| Preferred Language | Changes the Appliance Manager interface language. |
| HTTP Proxy URL | Routes release and image downloads through your organization's proxy. |
| Check for updates on startup | Checks for new versions of Appliance Manager itself. Use Check for Updates Now to run the check immediately. |
| Anonymous analytics telemetry | Optionally shares Appliance Manager usage analytics. This is off by default. |
Patch Bundle
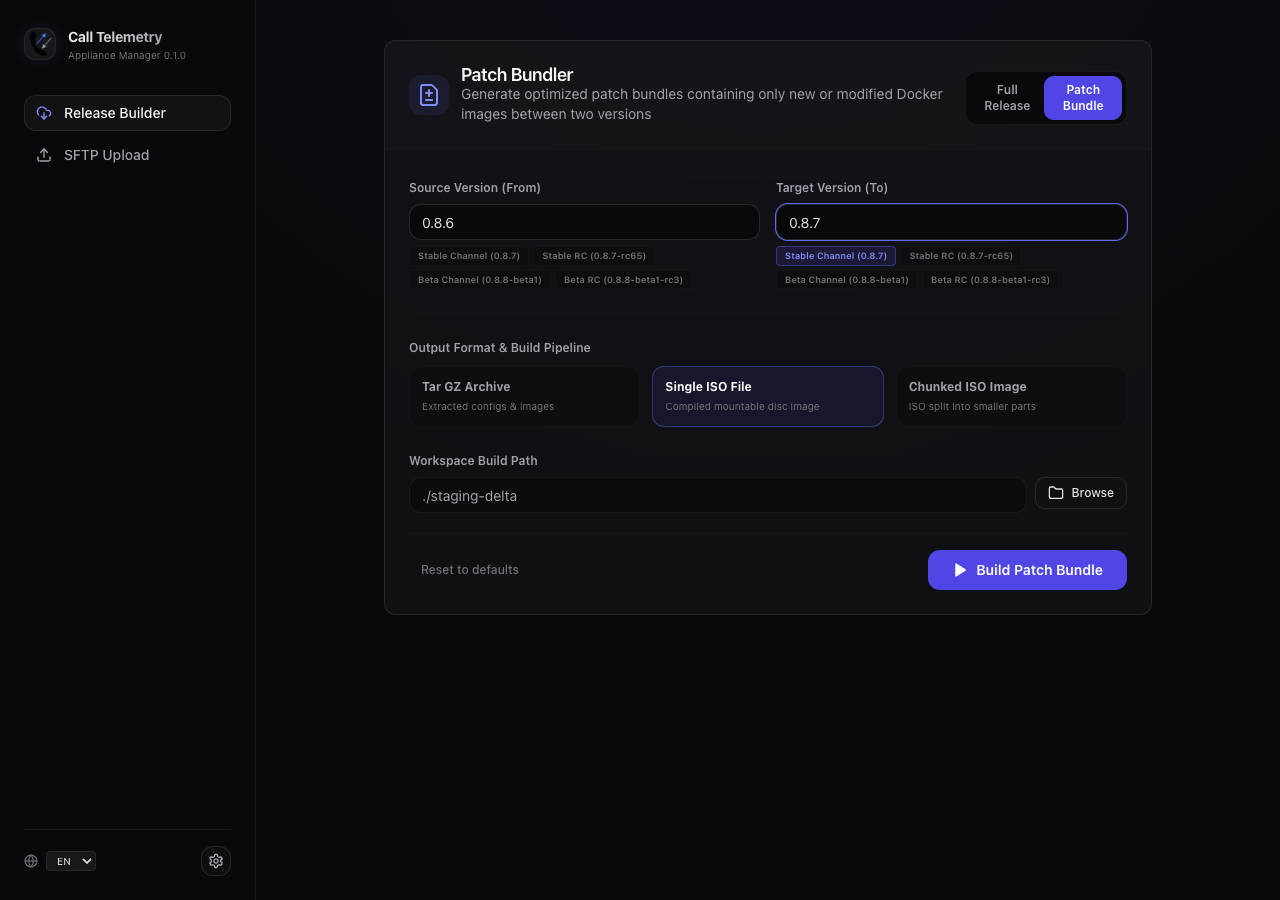
Use Patch Bundle when the appliance is already on a known version and you only need the image delta to the target version. Enter the exact running version: the appliance must already have every unchanged image marked as required by the patch manifest.
- Select Patch Bundle.
- Set From (running appliance version) and To (target version).
- Choose format and build path.
- Start the build.
Step 3 — Transfer to the Appliance
Copy the finished Tar GZ folder, .iso, or chunk parts to /home/calltelemetry/ on the air-gapped appliance:
- USB / removable media — per your organization's policy
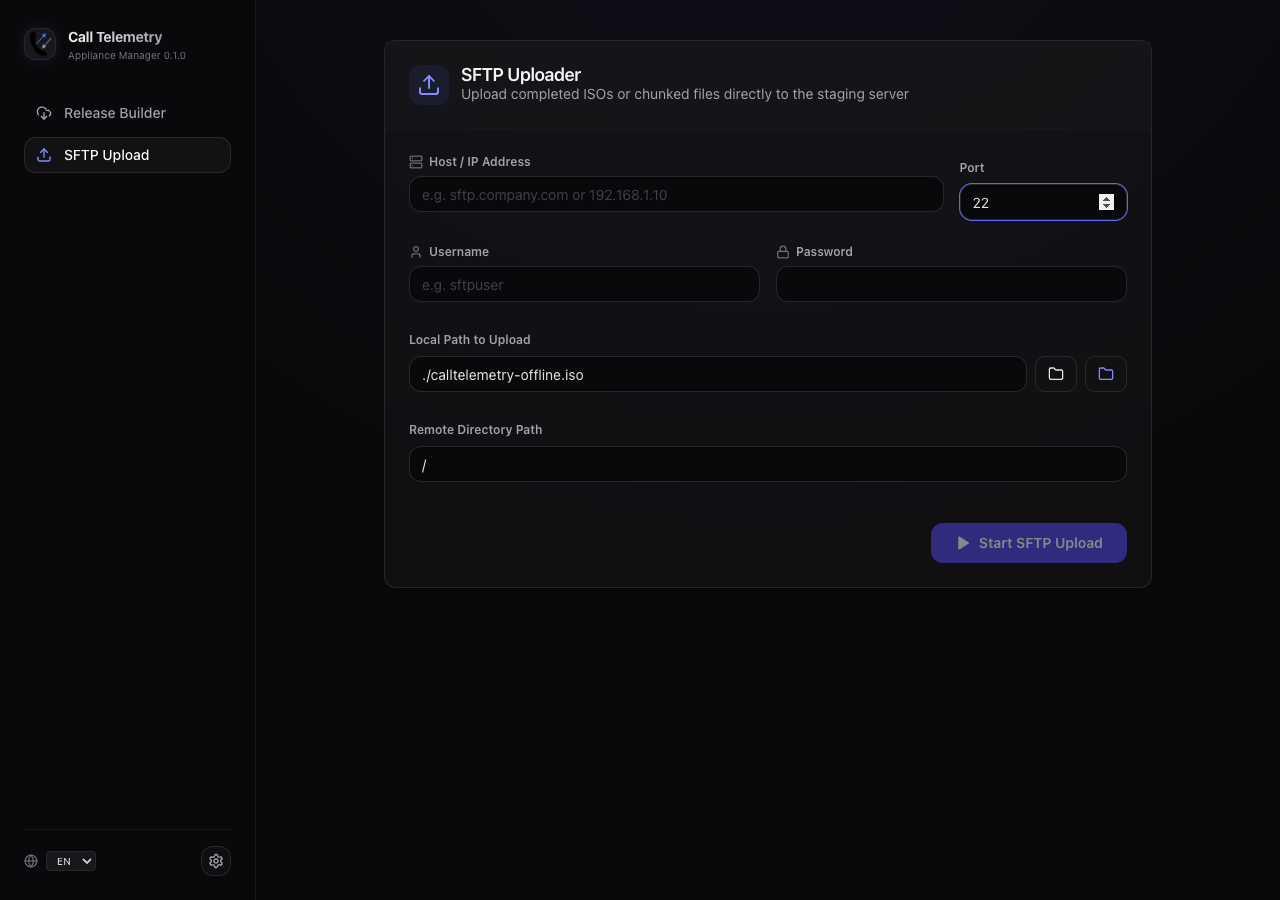
- SFTP — Appliance Manager SFTP Upload tab, or a client such as FileZilla, on port 22
- Other secure transfer — follow your policy
SFTP example (CLI)
sftp -P 22 calltelemetry@<appliance-ip>
put calltelemetry-offline.iso /home/calltelemetry/
exit
Port 2222 is for SSH management. Port 22 is for SFTP and CDR transfers only. Set Appliance Manager’s SFTP port to 22 when uploading to the appliance.
Step 4 — Apply on the Appliance
SSH into the appliance management port and apply the bundle with the native ct CLI (or legacy ./cli.sh):
ssh -p 2222 calltelemetry@<appliance-ip>
cd /home/calltelemetry
Remote SFTP / FTP Server
If your organization hosts update bundles on an internal SFTP or FTP file server, the appliance can download, verify, and apply the bundle in a single command:
# SFTP repository (with credentials in URL or prompted interactively)
sudo ct offline apply sftp://files.corp.local/bundles/calltelemetry-offline-0.8.7.tar.gz

# With explicit user, SSH private key, and retaining the downloaded bundle
sudo ct offline apply sftp://backup.corp.local/bundles/calltelemetry-offline-0.8.7.tar.gz \
  --user deploy --key /home/calltelemetry/.ssh/id_ed25519 --keep-download

# Internal FTP repository
sudo ct offline apply ftp://anonymous@ftp.corp.local/pub/calltelemetry-offline-0.8.7.tar.gz
When downloading from SFTP or FTP, the CLI automatically searches for a companion .sha256 checksum file on the remote server to verify bundle integrity prior to extraction. Staged download files are automatically purged after a successful apply unless --keep-download is specified.
Mounted ISO (recommended Appliance Manager output)
sudo mkdir -p /mnt/cdrom
sudo mount -o loop calltelemetry-offline.iso /mnt/cdrom
sudo ct offline apply /mnt/cdrom
Local Folder / Extracted Directory
Apply directly from an uncompressed or extracted release directory:
# Extracted / copied folder from Appliance Manager or tar extraction
sudo ct offline apply /home/calltelemetry/calltelemetry-build
Chunked ISO
# First chunk of a split ISO (auto-reassembles all parts in the directory)
sudo ct offline apply calltelemetry-offline.iso.part-000
First-time air-gapped update
If your existing appliance does not yet have native ct offline support, copy cli.sh from the mounted ISO or bundle root first:
sudo mkdir -p /mnt/cdrom
sudo mount -o loop calltelemetry-offline.iso /mnt/cdrom
cp /mnt/cdrom/cli.sh ./cli.sh && chmod +x ./cli.sh
./cli.sh offline apply /mnt/cdrom
offline apply loads images into the local Docker engine, installs versioned configs, merges version pins into .env, creates an automatic pre-upgrade database snapshot, verifies PostgreSQL readiness, and restarts services.
Step 5 — Verify
sudo docker ps
sudo docker logs calltelemetry-web -f
./cli.sh migration_status
Troubleshooting
Image load failures
df -h
ls -lh calltelemetry-offline.iso*
Service won't start
sudo systemctl status docker-compose-app.service
sudo journalctl -u docker-compose-app.service -f
Migration issues
./cli.sh migration_status
./cli.sh migration_run
Rollback
offline apply creates config backups. To roll back:
sudo systemctl stop docker-compose-app.service
sudo cp /home/calltelemetry/backups/docker-compose.yml.backup /home/calltelemetry/docker-compose.yml
sudo systemctl start docker-compose-app.service
If the CLI printed a snapshot timestamp, prefer:
./cli.sh rollback --snapshot <timestamp> --with-env
See Also
- Upgrading Guide — standard online upgrades
- CLI Reference — on-appliance
offline apply/offline listcommands